
Our Latest Articles
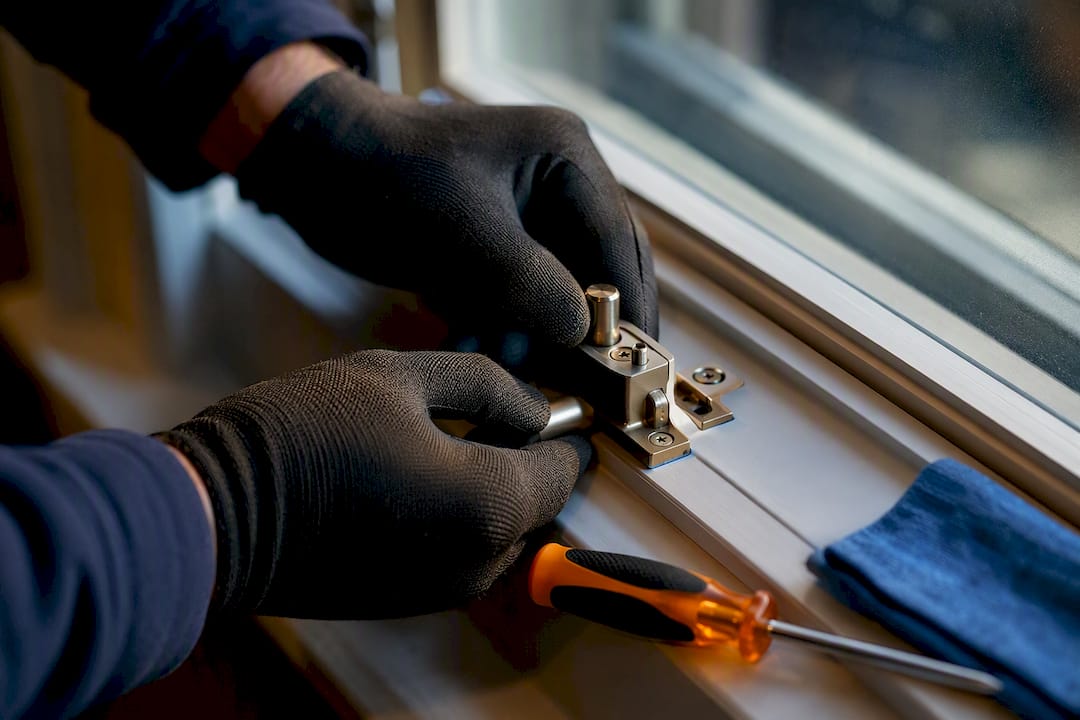
15 Minute Window Lock Repair for Dublin Homeowners
Most window lock problems come down to a misaligned sash or a dirty, dry mechanism, and both are fixable in fifteen minutes with a screwdriver and some silicone spray. If the handle grinds, a multi-point espagnolette system has jammed, or the frame itself has warped, stop there and call a locksmith. Start by checking sash alignment and lubricating the lock before you assume it needs replacing, and if that fails, ECS Locksmiths can take it from there.
TL;DR:
- Most window lock issues are caused by misalignment or dirt and can be fixed in minutes with lubrication and small adjustments.
- For multi-point locks or jammed mechanisms with brand-specific parts, professional replacement and repair are often necessary.
- Cleaning, lubricating, and properly aligning the lock or keeper typically resolve the majority of common failures without needing parts replacement.
- Replacing locks or keepers is straightforward for most homeowners, but brand-specific parts require exact matching and careful installation.
- Seek professional help if the handle spins freely without engaging the lock, the frame is warped, or the window was forcibly broken, as these conditions often need expert repairs.
Table of Contents
- What type of window lock do you have, and how do they usually fail?
- How do you troubleshoot a window that won’t lock?
- Can you replace the lock, keeper or handle yourself?
- When should you call a professional locksmith?
- What do manufacturers and locksmiths actually recommend?
- How do you lubricate and clean a window lock properly?
- What safety precautions matter during a window lock repair?
- Why do window locks rust, corrode, or stop springing back?
- What locksmiths actually see when they turn up to a job
- ECS Locksmiths: how we can help and how to book
- Sources
- FAQ
What type of window lock do you have, and how do they usually fail?
Before you touch a screwdriver, work out which mechanism you’re dealing with. Repair advice differs sharply between a simple sash latch and a multi-point espagnolette system, and treating one like the other wastes time or damages parts.
- Espagnolette/multi-point locks run a rod along the frame edge, engaging several points at once. When they jam, it’s usually stripped gears in the handle mechanism or a misaligned keeper further down the rod.
- Sash latches on older timber or PVC windows fail mostly from swelling, paint build-up, or a keeper that’s shifted out of line.
- Casement handles and operators (the crank mechanism on outward-opening windows) tend to seize from dried grease or grit in the gears, sometimes with a grinding noise but no sash movement.
- Sliding window keepers wear down or bend, so the latch no longer catches.
- Keyed security locks occasionally fail because the cylinder itself seizes rather than the frame moving.
Espagnolette systems and casement operators with grinding gears are the two types most likely to need a professional, because both often use brand-specific parts that aren’t sold as generic hardware.
How do you troubleshoot a window that won’t lock?
Work through this in order. Most simple misalignment and grime problems get sorted in the first three steps.
- Close the window fully and check the seating. Push firmly at the meeting rail or edge where the lock engages. If it doesn’t sit flush, the sash has dropped or swollen, and that alone can stop the latch reaching the keeper.
- Clean the track and lock mechanism. Wipe out dust, old grease, and grit with a dry cloth or a soft brush.
- Apply a silicone-based lubricant to the latch, hinges, and keeper. Trusted troubleshooting guides recommend silicone or PTFE sprays over oil-based products, which attract dust and gum up the mechanism over time.
- Test the lock again. If it’s close but not quite catching, loosen the two keeper screws slightly and nudge the plate a millimetre or two toward the direction the latch needs to travel, then retighten and test.
- Repeat the nudge-and-test cycle until the cam sits centrally in the keeper, rather than catching on one edge.
Most repair guides find alignment or strike plate positioning is behind the majority of non-lock failures, and nudging the keeper to match the cam’s travel arc solves it without replacing any parts.
Tools required: a screwdriver matching your screw heads (usually Phillips or Torx), silicone spray, a soft cloth, and a pencil to mark the keeper’s current position before you move it. The whole process typically takes a short amount of time for a single window, depending on how stubborn the paint or grime is.
Pro Tip: Mark the keeper’s original screw position with a pencil before loosening it. If your adjustment makes things worse, you can return to the exact starting point instead of guessing.
Never force a stiff handle, and never use a power drill or impact driver on lock screws. Small lock and keeper screws strip easily under power tools, and a stripped pilot hole turns a five-minute fix into a frame repair.
Can you replace the lock, keeper or handle yourself?
Once you’ve ruled out alignment and grime, a worn or broken part might be the real problem, and swapping a keeper or latch is genuinely within reach for most people. Replacement window locks and keepers are sold as drop-in parts for common casement, awning, and sliding systems, so before you buy anything, measure the screw spacing and overall footprint of the existing part and match it exactly.
The sequence itself is straightforward:
- Support the sash so it can’t drop or swing while you work.
- Remove the screws holding the old lock or keeper, keeping them in case the new part uses a different size.
- Fit the replacement, checking it seats flush before you tighten anything.
- Test the lock through several full open and close cycles, not just one.
Casement operators and espagnolette multi-point systems are a different story. These are frequently brand-specific, and fitting the wrong part can leave the window insecure even if it closes fine. Milgard’s own replacement guides exist precisely because Positive Action locks need the exact matching part and sequence, not a generic substitute.
Manufacturer instructions are consistent on one point: never use a drill driver to fasten small lock screws. Overtightening with power tools strips the thread and often cracks the surrounding PVC or timber, turning a straightforward swap into something a locksmith needs to fix properly.
When should you call a professional locksmith?
Some faults are simply not worth troubleshooting yourself, either because the tools and parts are specialist or because a badly done repair leaves the window insecure. Call a locksmith when you spot any of the following:
- The handle turns but nothing engages along the whole multi-point rod, not just at one point.
- You hear grinding in a casement operator with no sash movement, which usually signals stripped gears.
- The frame itself has visibly warped, bowed, or twisted.
- The window was forced during a break-in attempt, even if it still appears to close.
- You’ve already tried adjustment and lubrication and the fault persists.
A locksmith visit typically starts with checking sash seating, then testing gear engagement and inspecting for hidden frame damage before touching any hardware. Most straightforward lock or keeper swaps take a moderate amount of time on-site once parts are sourced. Costs vary by lock type and part availability, but expect a range of prices per window for standard repairs, with multi-point or operator replacements generally costing more.
A reputable locksmith should give you a proper inspection and a quote before starting work, offer some form of parts warranty, and have an emergency call-out option for anything urgent, particularly security-related faults after a break-in.
What do manufacturers and locksmiths actually recommend?
Manufacturer service guides are surprisingly consistent: support the sash properly before removing anything, use only the screws supplied with the replacement part, and never reach for a power drill on small lock fasteners. Professionals verify alignment the same way every time, by supporting the sash, pushing it tight at the meeting rail, and marking where the cam actually contacts the keeper before loosening a single screw.
One diagnostic professionals rely on for casement operators is the noise test: grinding during crank operation with no sash movement almost always means the gears have stripped, and at that point the operator needs an OEM or exact-match replacement rather than a generic part.
That single check saves a lot of wasted effort, because it tells you immediately whether you’re looking at a five-minute adjustment or a parts order.
How do you lubricate and clean a window lock properly?
Cleaning comes before lubrication, always. Wipe the track, latch, and keeper free of dust and old grease using a dry cloth, then use a soft brush or an old toothbrush to get into the gear teeth on casement operators, where grit tends to collect and cause the grinding you’d otherwise mistake for a mechanical failure.
Once the mechanism is clean, apply a silicone-based or PTFE dry lubricant directly into the latch mechanism, along the keeper’s contact edge, and into any visible gear teeth on an operator. A light spray is enough. Work the handle or crank through several full cycles afterwards so the lubricant reaches every moving surface rather than sitting on top.
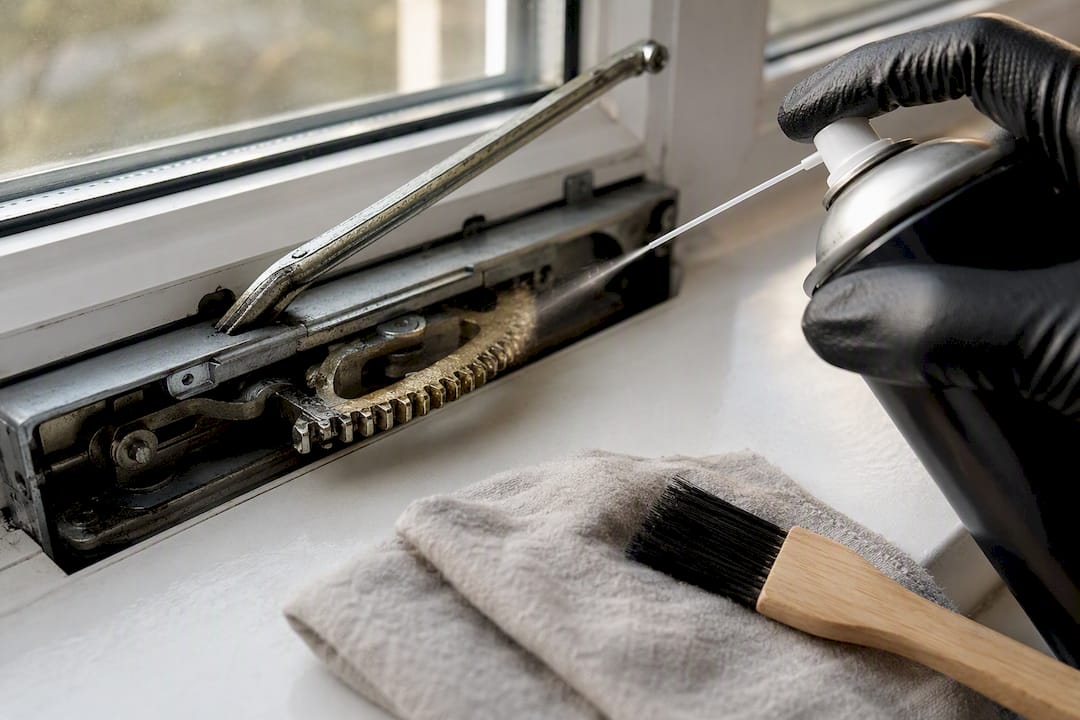
Avoid oil-based lubricants such as household oil or petroleum jelly. They feel like they’re working at first, but oil attracts dust and grit, which then builds into a paste inside the mechanism over weeks. That paste is often the real reason a lock that worked fine in spring seizes up again by autumn, and it’s a much harder fault to diagnose once it’s set in.
Do this maintenance twice a year, ideally once before winter and once after, since seasonal temperature and humidity swings are a major reason locks that worked fine for months suddenly bind. If you’ve just moved into a property or picked up management of one, a quick lubrication pass on every window lock is worth doing before you assume anything is actually broken.
What safety precautions matter during a window lock repair?
Working on window locks looks low-risk, but the two genuine hazards are cuts from old or stripped hardware and falls when the window is above ground level. Wear gloves when handling old screws, cracked plastic keepers, or corroded metal parts. Stripped screw heads and rusted keepers often have sharp edges you won’t notice until you’ve caught a knuckle on one.
Height is the bigger issue. If you’re working on an upstairs window, never lean out to reach a lock or keeper. Use a proper stepladder positioned on stable, level ground, and have someone else in the house while you’re working if the window requires you to be at any real height. Never attempt to access an upper floor window lock from outside using external ladders on soft ground, guttering, or anything not rated to hold your weight.
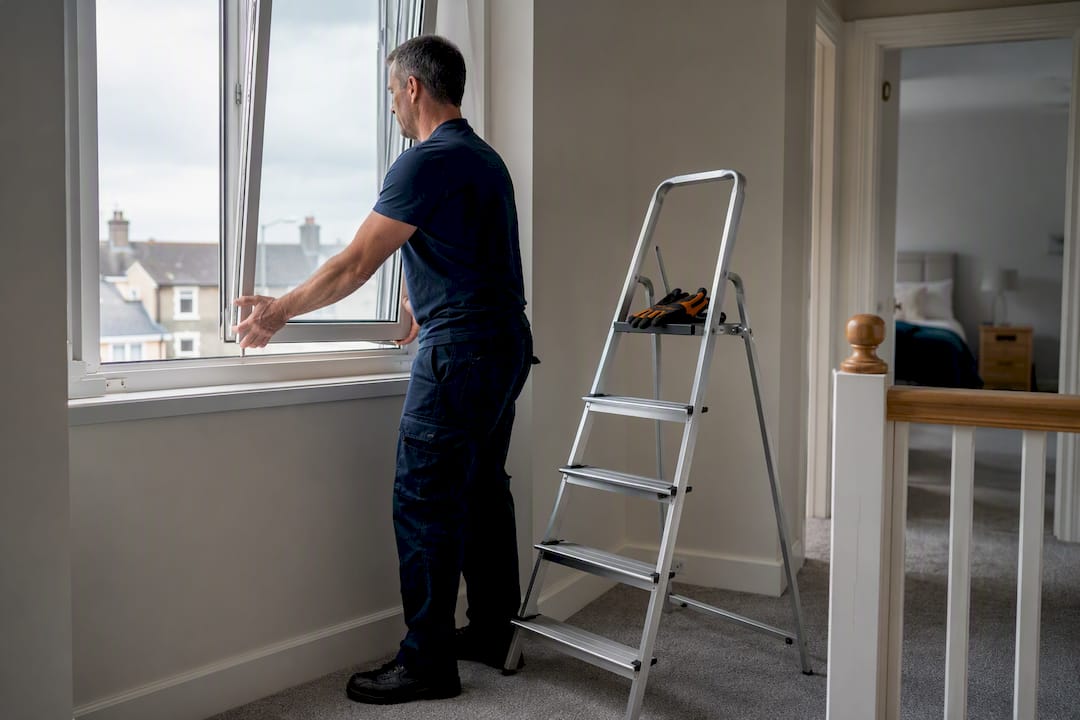
Support the sash properly before removing any screws, particularly on larger casement windows, where an unsupported sash can swing or drop unexpectedly once the lock is disengaged. This is exactly the same precaution manufacturer service guides call for during professional replacements, and it matters just as much for a DIY repair.
If a window is currently a security risk, meaning it won’t lock at all and you’re on a ground floor or easily accessible level, treat it as urgent rather than something to schedule around. A temporary wedge or additional latch is a stopgap, not a fix, and shouldn’t be relied on longer than a day or two before proper repair.
Why do window locks rust, corrode, or stop springing back?
Alignment issues get most of the attention, but rust, corrosion, and worn springs cause a meaningful share of lock failures too, particularly on older or coastal properties. Metal keepers and latch components exposed to condensation or salt air corrode from the inside, so a lock can look fine externally while the moving parts underneath have already seized.
If you spot surface rust, a wire brush and a light abrasive pad will usually clear it enough to test whether the mechanism still moves freely. Once clean, silicone lubricant should restore movement, though heavily pitted or corroded parts are usually better replaced than nursed along, since corrosion tends to return quickly once it’s taken hold in the metal.
A latch that doesn’t spring back into position, rather than one that’s simply misaligned, often points to a broken or fatigued internal spring. This isn’t something you can lubricate your way out of. Springs generally need the whole latch mechanism replaced rather than an individual part swap, since they’re rarely sold separately from the housing.
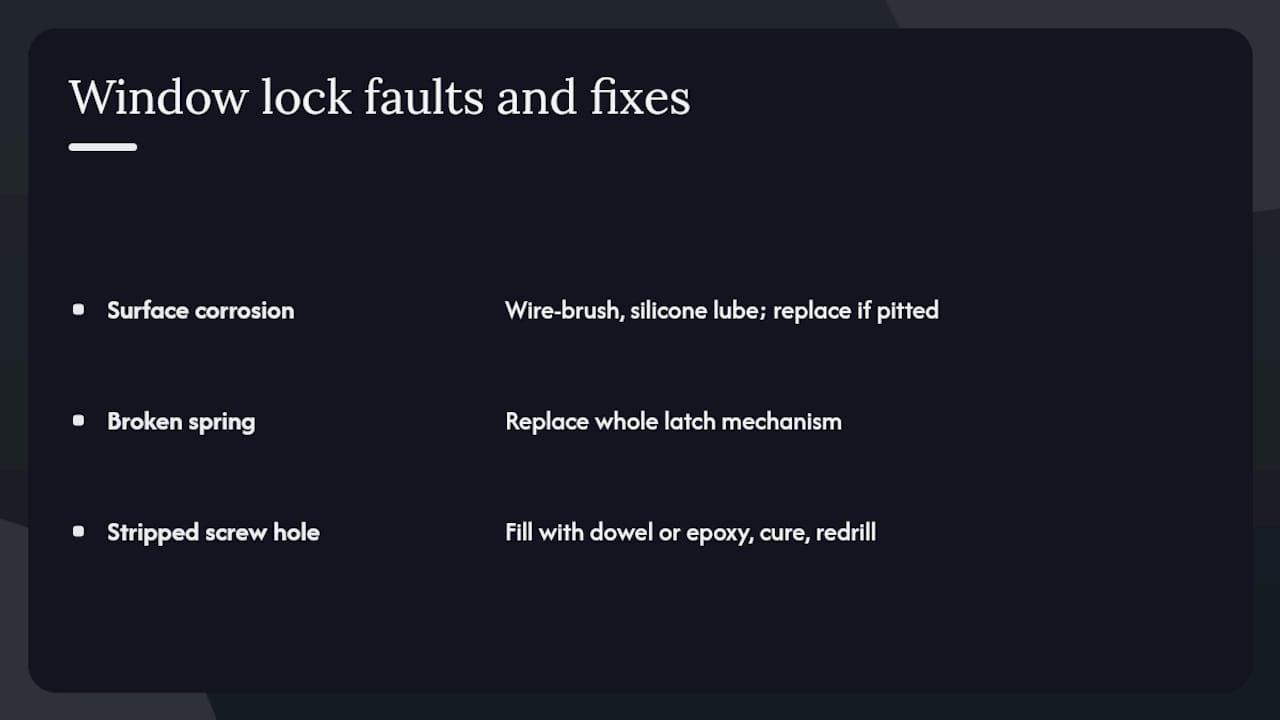
Stripped screw pilot holes are another common non-alignment fault, particularly in timber frames that have been drilled and redrilled over the years. The safest repair is to fill the old hole with a hardwood dowel or epoxy, let it cure fully, and drill a fresh pilot hole rather than forcing a screw into a hole that’s already lost its grip.
What locksmiths actually see when they turn up to a job
Most callouts we deal with aren’t dramatic failures, they’re slow ones. A sash that’s settled slightly over a few years, timber that’s swollen through a wet winter, or hardware that hasn’t seen a drop of lubricant since installation. On arrival, the priority is always the same: check sash seating first, then test gear engagement, then look for anything that suggests forced entry or structural warping before touching a single screw.
That order matters, because replacing hardware before ruling out alignment just means fitting a new lock that still won’t sit right. Homeowners who’ve tried the basics themselves and still can’t get it to catch tend to get the fastest, cheapest fix once we’re on site, simply because the easy causes are already off the list.
— Barry
ECS Locksmiths: how we can help and how to book
If you’ve worked through the checks above and the lock still won’t engage, or you’re dealing with a multi-point system, a seized operator, or a security concern after someone’s tried to force entry, that’s exactly where ECS Locksmiths comes in. On a visit, we diagnose the actual fault first, rather than assuming a full replacement is needed, source the correct part where one is required, and carry out the fix on-site with a warranty on the parts fitted.

Professional locksmiths operate in the Dublin area with availability that may include emergency call-outs. They can provide estimates before any work begins, so you know the likely cost before committing to a repair rather than after. If a wider issue turns up, such as a frame that’s warped enough to affect more than the lock, we’ll flag that clearly rather than just patching the symptom. For anything beyond the alignment and lubrication checks covered here, book a visit or get a free quote through the ECS Locksmiths landing page, and we’ll sort a time that works around you.
Sources
For official parts diagrams and step-by-step video instructions, the Andersen service guide covers lock and keeper replacement in detail, while Milgard’s how-to library walks through Positive Action lock swaps specifically. For sourcing generic drop-in parts, SWISCO’s catalogue lists common lock and keeper options by measurement.
- Andersen service guide: lock and keeper replacement
- SWISCO — replacement window locks & keepers
- Milgard how-to: replace your positive action lock
- How to fix a broken window latch — FixUpFirst
- How to fix my window locks — Koalaty Windows
FAQ
What should you do if the window lock isn’t working?
Check sash alignment first by pushing the window firmly closed at the meeting rail, then clean and lubricate the lock with a silicone spray. If it still won’t engage, adjust the keeper position slightly, and call a locksmith if the fault involves a multi-point system or grinding gears.
Can you replace just the lock on a window without replacing the whole frame?
Yes, most sash latches, keepers, and handles are sold as standalone replacement parts that fit directly onto the existing frame. You just need to measure the screw spacing and footprint of the old part to make sure the new one matches.
How do you fix a window lock that won’t catch?
In most cases, loosen the two keeper screws, shift the plate slightly in the direction the latch needs to travel, and retighten before testing again. This resolves the majority of catching problems without needing any new parts, according to repair guides that cover keeper adjustment.
How do you fix a window latch that’s stuck or stiff?
Clean out any grit or old grease from the latch mechanism, then apply a silicone or PTFE lubricant and work the handle through several full cycles. If it’s still stiff after that, the internal spring may be worn and the latch housing likely needs replacing rather than just cleaning.
When is it worth calling ECS Locksmiths instead of continuing DIY repairs?
Call once you’ve tried alignment and lubrication without success, or immediately if you’re dealing with a multi-point espagnolette system, stripped gears, or a lock damaged during an attempted break-in.
What services do locksmiths in Ireland actually offer?
It’s more than just unlocking doors. Most locksmiths provide:
Emergency lockouts (home, car, business)
Lock repairs and replacements
Key cutting and rekeying
Security upgrades (e.g. anti-snap locks)
Car key replacement
How quickly can you respond to an emergency?
In emergency situations, typical arrival times should be at your location within 20-30 minutes. There are always professional locksmiths on standby, ready to handle any lockout or security emergency, ensuring safety is never compromised.
Can a lockmsith help with high-security locks and systems?
Absolutely! Most locksmiths specialise in advanced high-security lock systems, including electronic locks, biometric security, smart locks, and keyless entry systems. The should be trained in the latest security technologies, ensuring that they can provide the highest level of protection for your home, office, or vehicle. Ask for a free expert consultation to help you choose the right security system for your needs.
Will a locksmith provide a warranty on there services?
Yes, all locksmiths should stand by the quality of there work and offer a 100% satisfaction guarantee. Most would by default offer a warranty on all services, ensuring that you receive the best craftsmanship and long-lasting results.
Can a locksmith open Cars
Yes, most locksmiths are trained to open cars.
How quickly can a locksmith get to me in an emergency?
Most locksmiths in Ireland offer 24/7 emergency callouts and typically arrive within 15–60 minutes, depending on your location and traffic. In Dublin, response times can be as fast as 10–30 minutes, especially for emergency lockouts.
Can a locksmith open my door without damaging it?
Yes A professional locksmiths use non-destructive entry methods first. Drilling is usually a last resort, not the default approach.
If someone immediately suggests drilling without inspecting the lock, that’s a red flag.
How much does a locksmith cost?
Costs vary depending on the service, time of day, and complexity of the job. A standard lockout is usually cheaper than replacing a lock. Emergency or late-night services may cost more.
Prices vary, but here’s a realistic guide:
Standard callout/labour: €85–€95
Lockout service: from ~€85–€120+
Lock replacement: depends on parts + labour
Important: Always ask for a full quote upfront and if there is a call out fee. Some companies advertise low prices but increase costs after arriving.
Prices can vary quite a bit… call around for quotes!
Can you make a key without the original?
Yes A professional locksmiths use non-destructive methods whenever possible. Damage usually only happens if the lock is faulty, high-security, or has already been tampered with.
Do locksmiths in Ireland need to be licensed?
Yes. In Ireland, all locksmiths must be licensed by the Private Security Authority (PSA).
If you’re hiring someone:
Ask for their PSA licence number
Avoid anyone who can’t prove credentials
By asking for the licence you avoid the scammers.
Providing Locksmith Services For More Than 30 Years in Dublin, lock outs, lock fitting, slam locks, car opening, commerical and domestic.


Quick Links
Home
About Us
Services
Testimonial
Faqs
Legal
Privacy Policy
Terms & Conditions